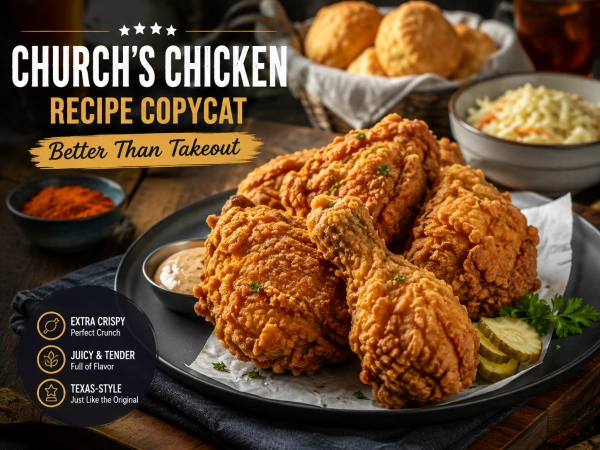
If you’ve ever driven past a Church’s Chicken and caught that smell, you know exactly why we’re here. That crunch, That peppery kick, That juicy bite underneath. Today, I’m sharing my tested church’s chicken recipe copycat that gets you shockingly close to the real thing, right in your own kitchen.
This isn’t just another fried chicken recipe. It’s a detailed, step-by-step church’s chicken recipe copycat built around the two things that actually matter: a long brine and a real double-dredge coating. Skip either one, and you’ll end up with regular fried chicken. Follow both, and you’ll swear you’re back in the drive-thru line.
Let’s get into it.
Why Church’s Chicken Tastes the Way It Does
Before we start cooking, let’s talk about why this chicken tastes so different from what you make at home. There are two secrets. Once you understand them, you’ll never fry chicken the old way again.
The 12-Hour Brine Secret
Church’s Chicken doesn’t just season the outside of the chicken. They season it all the way through. That’s the job of a long brine.
A basic marinade sits on the surface. A real brine, however, uses salt and buttermilk to break down muscle fibers. This lets seasoning travel deep into the meat. As a result, every bite tastes flavorful, not just the crust.
Twelve hours sounds like a long time. But honestly, most of that time is just waiting in your fridge. You do five minutes of work, then let the fridge do the rest.
The Double-Dredge Coating Technique (the real crunch trick)
Here’s the part most copycat recipes get wrong. They dip the chicken in flour once and call it done. That gives you a thin, average crust.
Church’s Chicken uses a double-dredge method instead. You coat the chicken, dip it back into the wet mixture, then coat it again. This creates layers. Those layers puff up in the fryer, creating that thick, craggy, shatter-crisp texture people love.
It sounds fussy, but it’s really just two extra steps. And trust me, it makes all the difference.
You might like:
- The Best Easy Fried Chicken Recipe Without Flour
- Applebee’s Honey Pepper Chicken Recipe
- The Ultimate Pretzel Coated Chicken Recipe
- 15 Best Indian Chicken Starters for Your Next Party
Ingredients You’ll Need
Good news: nothing here is exotic. You probably have most of this in your pantry already.
For the Brine
- 8 bone-in, skin-on chicken pieces (thighs, drumsticks, or a mix)
- 2 cups buttermilk
- 1 tablespoon hot sauce
- 1 tablespoon salt
- 1 teaspoon black pepper
- 1 teaspoon garlic powder
For the Crispy Coating
- 2 cups all-purpose flour
- 1 tablespoon paprika
- 1 tablespoon garlic powder
- 1 tablespoon onion powder
- 2 teaspoons black pepper
- 2 teaspoons salt
- 1 teaspoon cayenne pepper (optional, for a little heat)
- 1 cup buttermilk (for dredging)
- 2 large eggs
- Oil for frying (vegetable or peanut oil works best)
That’s it. Simple ingredients, big flavor payoff.
Step-by-Step Copycat Recipe
Now let’s walk through the actual cooking process. I’ll break it into three easy stages.
Marinating the Chicken
First, whisk together the buttermilk, hot sauce, salt, pepper, and garlic powder in a large bowl.
Next, add your chicken pieces. Make sure each piece is fully submerged. Cover the bowl and place it in the fridge.
Ideally, let it brine for 12 hours. If you’re short on time, even 4 hours will still improve the flavor a lot. But if you want that true church’s chicken recipe copycat taste, don’t rush this step.
Coating and Double-Dipping
Once the chicken has brined, pull it out and let any excess liquid drip off.
In one bowl, mix your flour with all the spices. In another bowl, whisk the eggs with the extra cup of buttermilk.
Here’s the double-dredge method, step by step:
- Dip the chicken into the seasoned flour first
- Then dip it into the egg-buttermilk mixture
- Dip it back into the flour a second time, pressing gently so it sticks
That second flour coat is what builds the thick, craggy crust. Don’t skip it, even though it feels repetitive.
Once coated, place the chicken on a wire rack. Let it rest for 15 minutes before frying. This helps the coating set, so it doesn’t fall off in the oil.
Frying to Golden Perfection
Heat your oil to 325°F in a deep pot or Dutch oven. A thermometer really helps here, since guessing the temperature usually leads to soggy or burnt chicken.
Fry the chicken in small batches. Don’t crowd the pot, or the temperature will drop too fast.
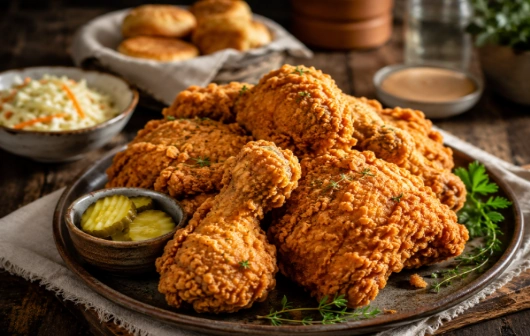
Cook for about 12 to 15 minutes per batch, flipping occasionally. The chicken is done when it hits 165°F internally and the coating turns deep golden brown.
Finally, place the fried chicken on a wire rack, not paper towels. Paper towels trap steam underneath, which softens your crispy crust.
3 Ways to Cook It (Fried vs. Air Fryer vs. Oven-Baked)
Deep frying gives you the most authentic results. But I get it, not everyone wants a pot of hot oil on a weeknight. So here are three solid options.
Classic Deep-Fried Version
This is the method above, and it’s the closest match to real Church’s Chicken. If you’re making this for a special dinner or craving that exact taste, fry it.
Healthier Air Fryer Version
Coat the chicken the same way, using the double-dredge method. Then spray it generously with oil before air frying.
Cook at 380°F for about 22 to 25 minutes, flipping halfway through. It won’t be identical to deep-fried, but it’s genuinely crispy and much lighter.
Oven-Baked Version for Meal Prep
This method is perfect if you’re cooking for the week ahead. Place coated chicken on a wire rack over a baking sheet. Spray with oil, then bake at 400°F for 35 to 40 minutes.
The wire rack matters here. It lets air circulate underneath, so the bottom doesn’t turn soggy while baking.
The Spicy Church’s Chicken Version
Want the spicy version? It’s easy to make happen.
Simply add 1 extra teaspoon of cayenne pepper to your dredging flour. You can also mix a teaspoon of hot sauce into your egg wash for extra kick.
For an even bolder version, sprinkle a pinch of cayenne over the chicken right after frying, while it’s still hot. The heat sticks better to warm, oily skin.
Common Mistakes That Ruin the Crunch
Even with a great recipe, small mistakes can wreck your crust. Let’s fix the most common ones.
Why Your Coating Falls Off
This usually happens for one of two reasons. Either the chicken wasn’t dry enough before dredging, or you skipped the resting step before frying.
To fix this, always let coated chicken rest for 15 minutes on a rack. This lets the flour « glue » itself to the buttermilk layer underneath.
I actually learned this the hard way. The first time I made this recipe, I fried the chicken right after coating it. Half the crust slid straight into the oil. Now I never skip the resting step, and my coating stays put every single time.
Why the Chicken Turns Soggy
Soggy chicken almost always comes down to oil temperature. If your oil is too cool, the coating soaks up oil instead of crisping up.
Always fry at 325°F, and check it with a thermometer between batches. Also, avoid stacking fried chicken pieces on top of each other. Trapped steam is the enemy of crunch.
What to Serve With It
No fried chicken dinner feels complete without the right sides. Here are the classics.
Honey Butter Biscuits
Warm, flaky biscuits with a drizzle of honey butter pair perfectly with spicy, crispy chicken. The sweetness balances the heat beautifully.
Classic Sides (coleslaw, mashed potatoes, gravy)
- Creamy coleslaw for a cool, crunchy contrast
- Buttery mashed potatoes with gravy
- Sweet corn on the cob
- Mac and cheese, if you’re feeling indulgent
Any of these turn your copycat chicken into a full, satisfying meal.
Storage, Reheating & Meal Prep Tips
This recipe stores well, which makes it great for meal prep or leftovers.
Store cooked chicken in an airtight container in the fridge for up to 4 days. For longer storage, freeze it for up to 3 months.
How to Keep the Crunch After Reheating
Never microwave fried chicken if you care about texture. It turns the crust rubbery almost instantly.
Instead, reheat it in an air fryer at 375°F for about 8 minutes, or in the oven at 400°F for 12 to 15 minutes. Place it on a wire rack while reheating. This keeps that signature crunch alive, even on day three.
FAQ
What makes Church’s chicken different from KFC?
Church’s Chicken uses a heavier, cracker-like coating with a peppery, slightly spicy edge. KFC leans more herby and blended. The texture is also noticeably crunchier at Church’s, thanks to that double-dredge method.
Can I make this gluten-free?
Yes, absolutely. Swap the all-purpose flour for a 1:1 gluten-free flour blend. The texture stays crispy, though slightly lighter than the original.
Is this church’s chicken recipe copycat spicy?
The base recipe has mild heat. If you want it spicier, add extra cayenne to the flour and egg wash, as explained above.
Can I use chicken breasts instead of thighs?
You can, but thighs and drumsticks stay juicier during frying. If you use breasts, watch the cook time closely to avoid drying them out.
Do I have to fry this recipe, or can I bake it?
You don’t have to fry it. The oven-baked and air fryer versions above both give great results, just slightly less crispy than deep frying.
How long should I brine the chicken for the best flavor?
Twelve hours gives you the deepest flavor. If you’re in a hurry, four hours still works, but the taste won’t be quite as intense.
Final Thoughts
This church’s chicken recipe copycat proves you don’t need a drive-thru to get that crispy, peppery, deeply seasoned chicken you love. The brine builds flavor, the double-dredge builds crunch, and the rest is just patience.
Your action plan: brine your chicken tonight, double-dredge it tomorrow, and fry it up for a dinner that tastes just like the real thing.